Images on a website
The size of the elements on a web page determine how quickly that page loads - an issue that is very important both to website visitors as well as the search engines, who downgrade slow sites. This is particularly important when our sites are viewed by mobile devices where the internet connection may be much slower. And the element that affects opening speed the most is the image.
There are two common image formats used in websites - JPG and PNG. The JPG is the most common format as it compresses the photo well with very little loss of quality. PNG produces a larger file but can be used when part of the photo is transparent.
As even the most basic smartphone can produce photos of over 2MB in size, so it is important to compromise between the quality and the size of the image. Patently the larger the image, the longer the page takes to load.
Press this button to see how long it takes to load a 3.59MB image
Load Image
OK, not bad, now imagine how long it would take to load the page if you had 10 photos of that size on your website. 35MB. On a slow speed connection, that could be 60 seconds!
You have to remember two things:
Visitors wait around for around 8 seconds for your website to appeal to them - you've already gone over your time.
Google hates slow websites - pop along to Webmaster Tools to see how it reacts to slow loading sites.
So, what do we do?
Well, thanks for asking.
The answer is that you have to reduce the size of the photos before you upload them.
"Oh, no." you cry, "I'm a prima donna photographer, I can't accept low quality."
Well, don't worry, Norman, it's not that bad and here's why:
A reasonable sized desktop screen today might be around 23" from one corner to another and, in that space, there are 1920 dots of light in rows from left to right and 1080 dots of light in columns down the page. Each dot of light, OK let's call them pixels, is, effectively, a single colour.
If you want your photo to absolutely cover the screen of your monitor, then, no matter what you do, your photo can only be shown with that number of pixels.
There's more.
It is highly likely that your photo will not take up the entire screen. In fact, it might just take up the middle bit of the website so it needn't be bigger that 960 pixels from left to right.
There's even more.
On tablets and phones - the screens are even smaller so when a hotshot web designer like me :) builds a website, we put lower size and quality images on these devices. Let's face it, there's no point having a 200KB image loading on your Android, especially if the signal is crap. That's when your internet speed really makes a difference.
Finally, whenever you resave a photo you suffer some degree of loss of quality, this is due to the fact that a large image might have 10MB of information while as small image will only have 200KB. The process by which this takes place involves some degree of compromise as pixels are effectively lost. This is normally completely unnoticeable, but it is inevitable as part of the process of reduction.
1. Reduce the size of your photo.
Open it in Photoshop or any cheap and cheerful image program and reduce the photo down to the approximate width of the final size of the photo. In other words if your website area is 1000 pixels and the photo takes up one third the width, then reduce the photo to 330 pixels. You don't have to be exact - what's a few pixels between friends.
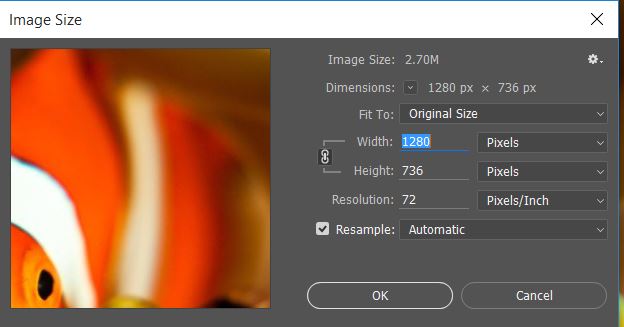
While you are at it, check out the Resolution above. Over the last few years most creative types will tell you that there's no point creating a resolution of more than 72 pixels per inch. This is not strictly true. Modern monitors can cope with a higher number than this. BUT, my advice is don't bother going higher than this unless you have a specific reason to do so.
2. Change the 'quality' of your photo.
If we take it that the two most common formats for websites are JPG and PNG, lets discuss the ways we can reduce the photo size without reducing quality.
Have a look at these four images.

JPG - 10% Quality, 350 pixels wide, 5.91 KB
JPG - 30% Quality, 350 pixels wide, 8.56 KB

JPG - 60% Quality, 350 pixels wide, 17.38 KB

JPG - 100% Quality, 350 pixels wide, 59.04 KB
I saved all the photos above in Photoshop CC from the original image. I saved each one at 350 px wide, without optimisation and then noted the file size.
What's interesting here is:
1. At first glance the images look very similar.
2. The 100% photo is 10 x the size of the 10% photo. Surprised?
3. There is virtually no discernible difference between the 60% and 100% images - and the 60% image is only a third of the size of the 100% image.
So what about comparing larger images?

JPG - 30% Quality, 700 pixels wide, 20.03 KB

JPG - 60% Quality, 700 pixels wide, 43.44 KB

JPG - 100% Quality, 700 pixels wide, 170.5 KB
Notice:
1. A 700 pixels wide photo is nearly three time the size of a 350 pixels wide photo.
2. There's very little pixelation with any of them.
3. The 100% quality image is six times larger than the 30% image.
How does JPG compare to PNG?
PNG files can have transparent backgrounds, so if that what you want to do then you have no choice, but how does JPG compare to PNG in terms of quality and size.
Well, first; PNG are not saved as %age quality, they are saved as either PNG8 or PNG24. PNG8 supports fewer colours - 256 - and 8 bits per pixel while PNG24 supports up to 6 million colours and is 24 bits per pixel.
This is all neither here nor there so lets see how they all compare.
PNG8 - 700 pixels wide, 122.9 KB
JPG - 60% Quality, 700 pixels wide, 43.44 KB

PNG24 - 700 pixels wide, 339.9 KB
As you can see, there is very little difference in quality between all three images and yet the PNG images are substantially larger. Ten of those little buggers on your page and you've got 3.4MB of images loading everytime a visitor swings by. Maybe with your fancy fibre optic broadband that's not an issue, but for a rural user on lower speeds, that's a struggle.
Verdict
I use JPG 95% of the time and, in terms of quality I rarely go higher than 60%.
Even large images - 2,000 pixels wide are fine at 40-60%.
Small photos can be very low quality - it is almost impossible to notice any loss of quality.
I only use PNG when the image includes a transparent element.
Although speed isn't everything, you can make your website firey fast by being sensible with your images.
If you must have top quality images on your site, try and restrict them to a small number per page.
Web companies like Zigger also additionally use adaptive design which allows us to design websites and pages for the device used to view them. This means we produce smaller images for smaller screens. After all why put a 1900 pixel image on a screen that is only 400 pixels wide?
You may not be able to do this, but, with the rise and rise of smaller devices, you should try to make it happen.
I hope this has been useful for you, feel free to drop me a line if you have any comments or queries.
Hywel - hi@zigger.co.uk
Here's a few free online editors you can use on your photos without buying Photoshop:
Pixlr | Fotor | Picmonkey | Gimp | Canva
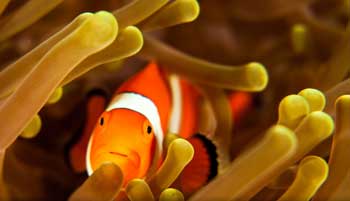
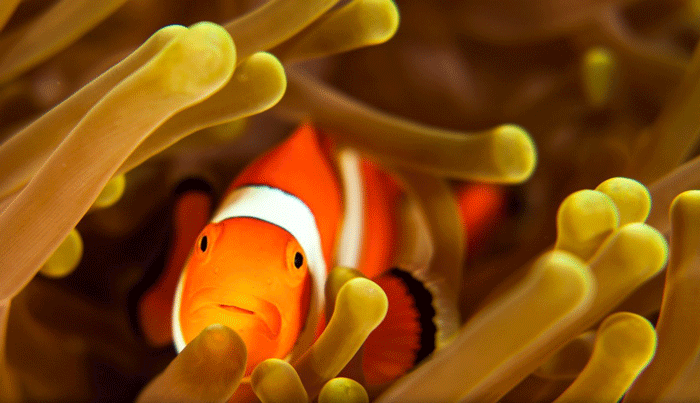
Thanks to Philip Hamilton at Hamilton Underwater for the great image of the fish
